
Lab 10-1 installing a printer – Welcome to the realm of printer installation, where technology meets efficiency! Join us on an adventure through Lab 10-1, where we’ll demystify the art of connecting your printer to your computer. Get ready to conquer the challenges of installation with our expert guidance and make your printing dreams a reality.
In this comprehensive guide, we’ll cover everything you need to know, from choosing the right printer to troubleshooting common issues. So, sit back, relax, and let’s embark on this printing expedition together!
Introduction to Printer Installation
Installing a printer is a crucial step for utilizing its capabilities and ensuring seamless printing. Various types of printers are available, each catering to specific needs and preferences. Understanding the types and the installation process empowers users to make informed choices and effectively utilize their printers.
The installation process typically involves connecting the printer to a computer or network, installing the necessary software, and configuring the printer settings. By following the manufacturer’s instructions carefully, users can ensure a successful installation and enjoy the benefits of hassle-free printing.
Types of Printers
Printers come in various types, including:
- Inkjet Printers:Known for producing high-quality prints, inkjet printers use cartridges filled with liquid ink. They are suitable for home and office use.
- Laser Printers:Laser printers use a toner powder and a laser beam to create prints. They are known for their fast printing speeds and cost-effectiveness, making them ideal for high-volume printing.
- Dot Matrix Printers:Dot matrix printers use a series of pins to create prints. They are primarily used for printing on continuous forms or multipart documents.
- Thermal Printers:Thermal printers use heat to create prints. They are commonly used in retail and hospitality settings for printing receipts and labels.
Preparation for Installation
Before embarking on the installation process, it’s crucial to ensure you have everything you need and that your system is ready to accommodate the new printer.
In Lab 10-1, we’re delving into the world of printer installation. As we navigate the technicalities, let’s take a moment to consider the complexities of maritime navigation. Just as we connect our printers to our computers, ships at sea rely on precise calculations to determine their location.
A fascinating example is the at noon ship a is 150 km west scenario. Returning to our printer installation, we continue our journey of connecting devices and ensuring seamless operation.
Identify the necessary tools and materials required for installation
Gather the essential tools and materials to make the installation process smooth and efficient. This may include screwdrivers, wrenches, cables, and any other items specified in the printer’s documentation.
Determine the appropriate location for the printer
Choose a suitable location for the printer that meets the following criteria:
- Accessibility: Ensure the printer is easily accessible for regular use and maintenance.
- Ventilation: Place the printer in a well-ventilated area to prevent overheating.
- Space: Provide adequate space around the printer for proper airflow and easy access to ports and buttons.
- Stability: Select a stable surface that can support the weight of the printer and prevent vibrations.
Check system compatibility and ensure necessary drivers are available
Verify that your system meets the minimum requirements for the printer. Ensure that the operating system and hardware are compatible with the printer model. Additionally, download and install the latest printer drivers from the manufacturer’s website to ensure optimal functionality.
Physical Installation

The physical installation of a printer involves connecting it to your computer, loading paper and cartridges, and configuring its settings. Follow these steps to complete the physical installation:
Connecting the Printer to the Computer
- Turn off the printer and computer.
- Connect the printer to the computer using a USB cable or Ethernet cable.
- Turn on the printer and computer.
Loading Paper and Cartridges, Lab 10-1 installing a printer
- Open the printer’s paper tray.
- Load paper into the tray.
- Close the paper tray.
- Open the printer’s cartridge compartment.
- Insert the cartridges into their designated slots.
- Close the cartridge compartment.
Configuring Printer Settings
Once the printer is connected and loaded, you need to configure its settings. This includes setting the default paper size, print quality, and other preferences. You can usually access the printer settings through the printer’s control panel or by using the printer’s software.
Software Installation
Installing the appropriate printer drivers is crucial to ensure seamless communication between your computer and the printer. These drivers act as translators, enabling your computer to understand and execute the commands necessary for printing.
Driver Installation Process
- Identify the make and model of your printer.
- Visit the manufacturer’s website and locate the driver download page specific to your printer.
- Download the latest driver package compatible with your operating system.
- Run the downloaded file and follow the on-screen instructions to install the drivers.
- Once the installation is complete, restart your computer to apply the changes.
Setting Up Printer Preferences and Options
After installing the drivers, you can configure the printer’s preferences and options to suit your specific needs. This includes settings such as paper size, orientation, print quality, and duplex printing.
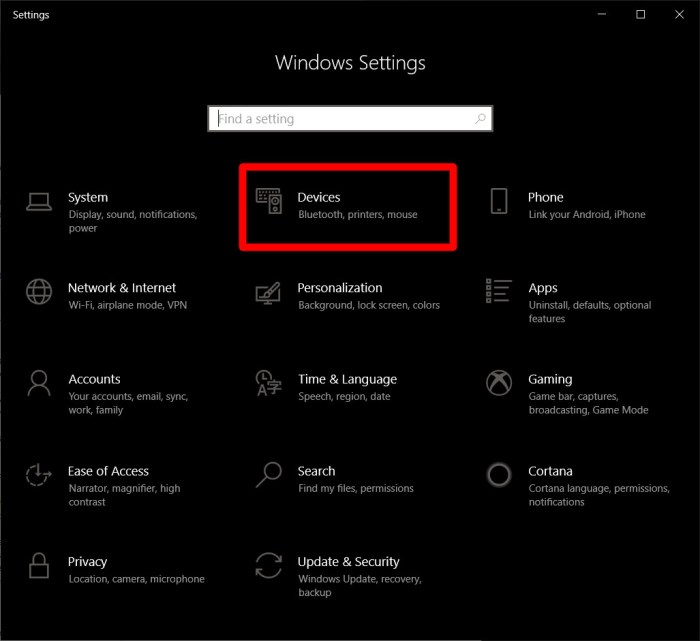
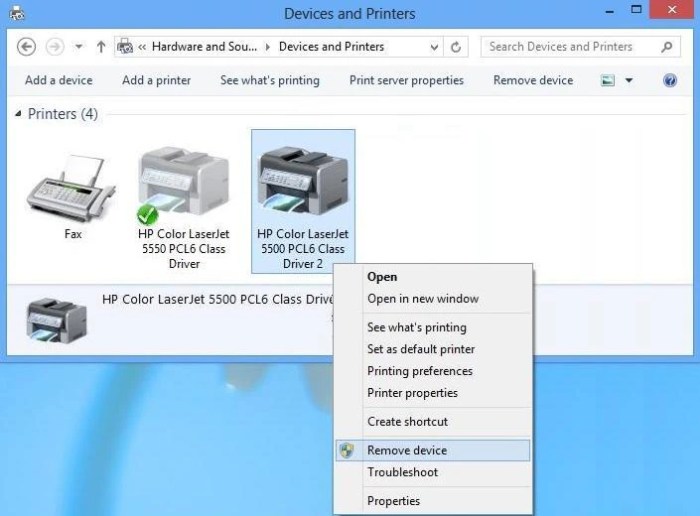
- Open the “Printers” or “Devices and Printers” window in your computer’s settings.
- Right-click on your printer and select “Printer Properties” or “Printing Preferences.”
- Adjust the settings as desired and click “OK” to save the changes.
Troubleshooting Common Issues
Encountering problems during printer installation is not uncommon. This section provides insights into potential issues and offers practical solutions to help you resolve them effectively.
Before proceeding, ensure that you have thoroughly checked the following:
- The printer is powered on and connected to the computer.
- The correct printer drivers are installed.
- The printer is not set to “offline” mode.
If the issue persists, refer to the troubleshooting tips below:
Printer Not Recognized
If your computer fails to recognize the printer, try the following:
- Check if the printer is properly connected to the computer via a USB cable or network.
- Restart the computer and the printer.
- Update the printer drivers.
- Try connecting the printer to a different USB port.
Connection Issues
If you encounter connection problems, consider the following:
- Ensure that the printer is connected to the same network as your computer.
- Check if the firewall or antivirus software is blocking the printer’s connection.
- Reset the printer’s network settings.
- Contact your network administrator for assistance.
Printing Errors
In case of printing errors, refer to the following:
- Check if there is sufficient paper in the printer.
- Ensure that the paper is properly loaded into the printer.
- Clean the printer’s print heads.
- Check the printer’s ink levels.
Maintenance and Support

Maintaining your printer is crucial to ensure its optimal performance and longevity. Regular cleaning and servicing will prevent issues and extend its lifespan.
To clean your printer, use a soft, dry cloth to wipe down its exterior. For the interior, use a compressed air can to remove dust and debris. Additionally, clean the print heads regularly to prevent clogged nozzles.
Warranty and Support Options
Most printers come with a standard warranty that covers repairs or replacements for a specific period. If you experience any issues during this time, contact the manufacturer for support.
Extended warranties are also available for purchase, providing additional coverage beyond the standard warranty period. These warranties typically cover accidental damage, extended labor, and on-site repairs.
In addition to warranties, many manufacturers offer technical support through phone, email, or online chat. They can assist with troubleshooting, driver installation, and other technical issues.
User Queries: Lab 10-1 Installing A Printer
What if my printer isn’t recognized by my computer?
Check if the printer is properly connected to your computer and that the necessary drivers are installed. Restart both your printer and computer and try again.
How do I resolve printer error messages?
Refer to the printer’s user manual or consult the manufacturer’s website for specific error codes and troubleshooting steps.
What is the recommended maintenance schedule for my printer?
Regular cleaning and servicing can extend the lifespan of your printer. Consult the user manual for specific maintenance instructions.
